VPN – Windows10
On Windows 10 machine:
- select Settings/Network & Internet/VPN
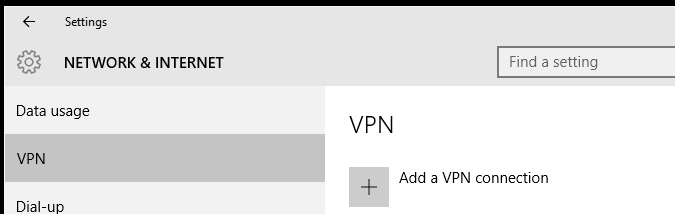
- select “Add a VPN connection”
- set “Windows” for the VPN provider
- assign connection name like “Mainframe”
- set sstp.hilsberg.com as Server name
- set “Point to Point Tunneling Protocol (PPTP)” as VPN type
- set user name and password that were assigned to you
- click on “Save”

- go back to “Network & Internet”
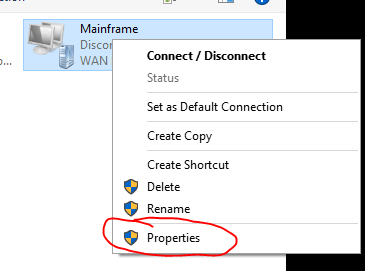
- click on “Change adapter options”

- right-click on the newly-created adapter

- select “properties”
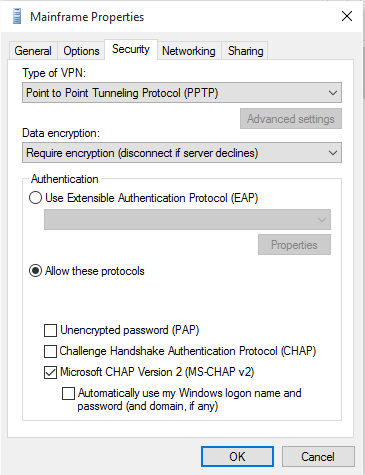
- select “security” tab
- set “require encryption” in the Data Encryption field
- in the authentication area, click on “Allow these protocols”
- make sure that only “Microsoft CHAP Version 2 (MS-CHAP V2)” is selected
- click “OK”
- click on the newly-created connection
- click on “Connect” and you should be done